STEP 1 - SOURCE A PATTERN
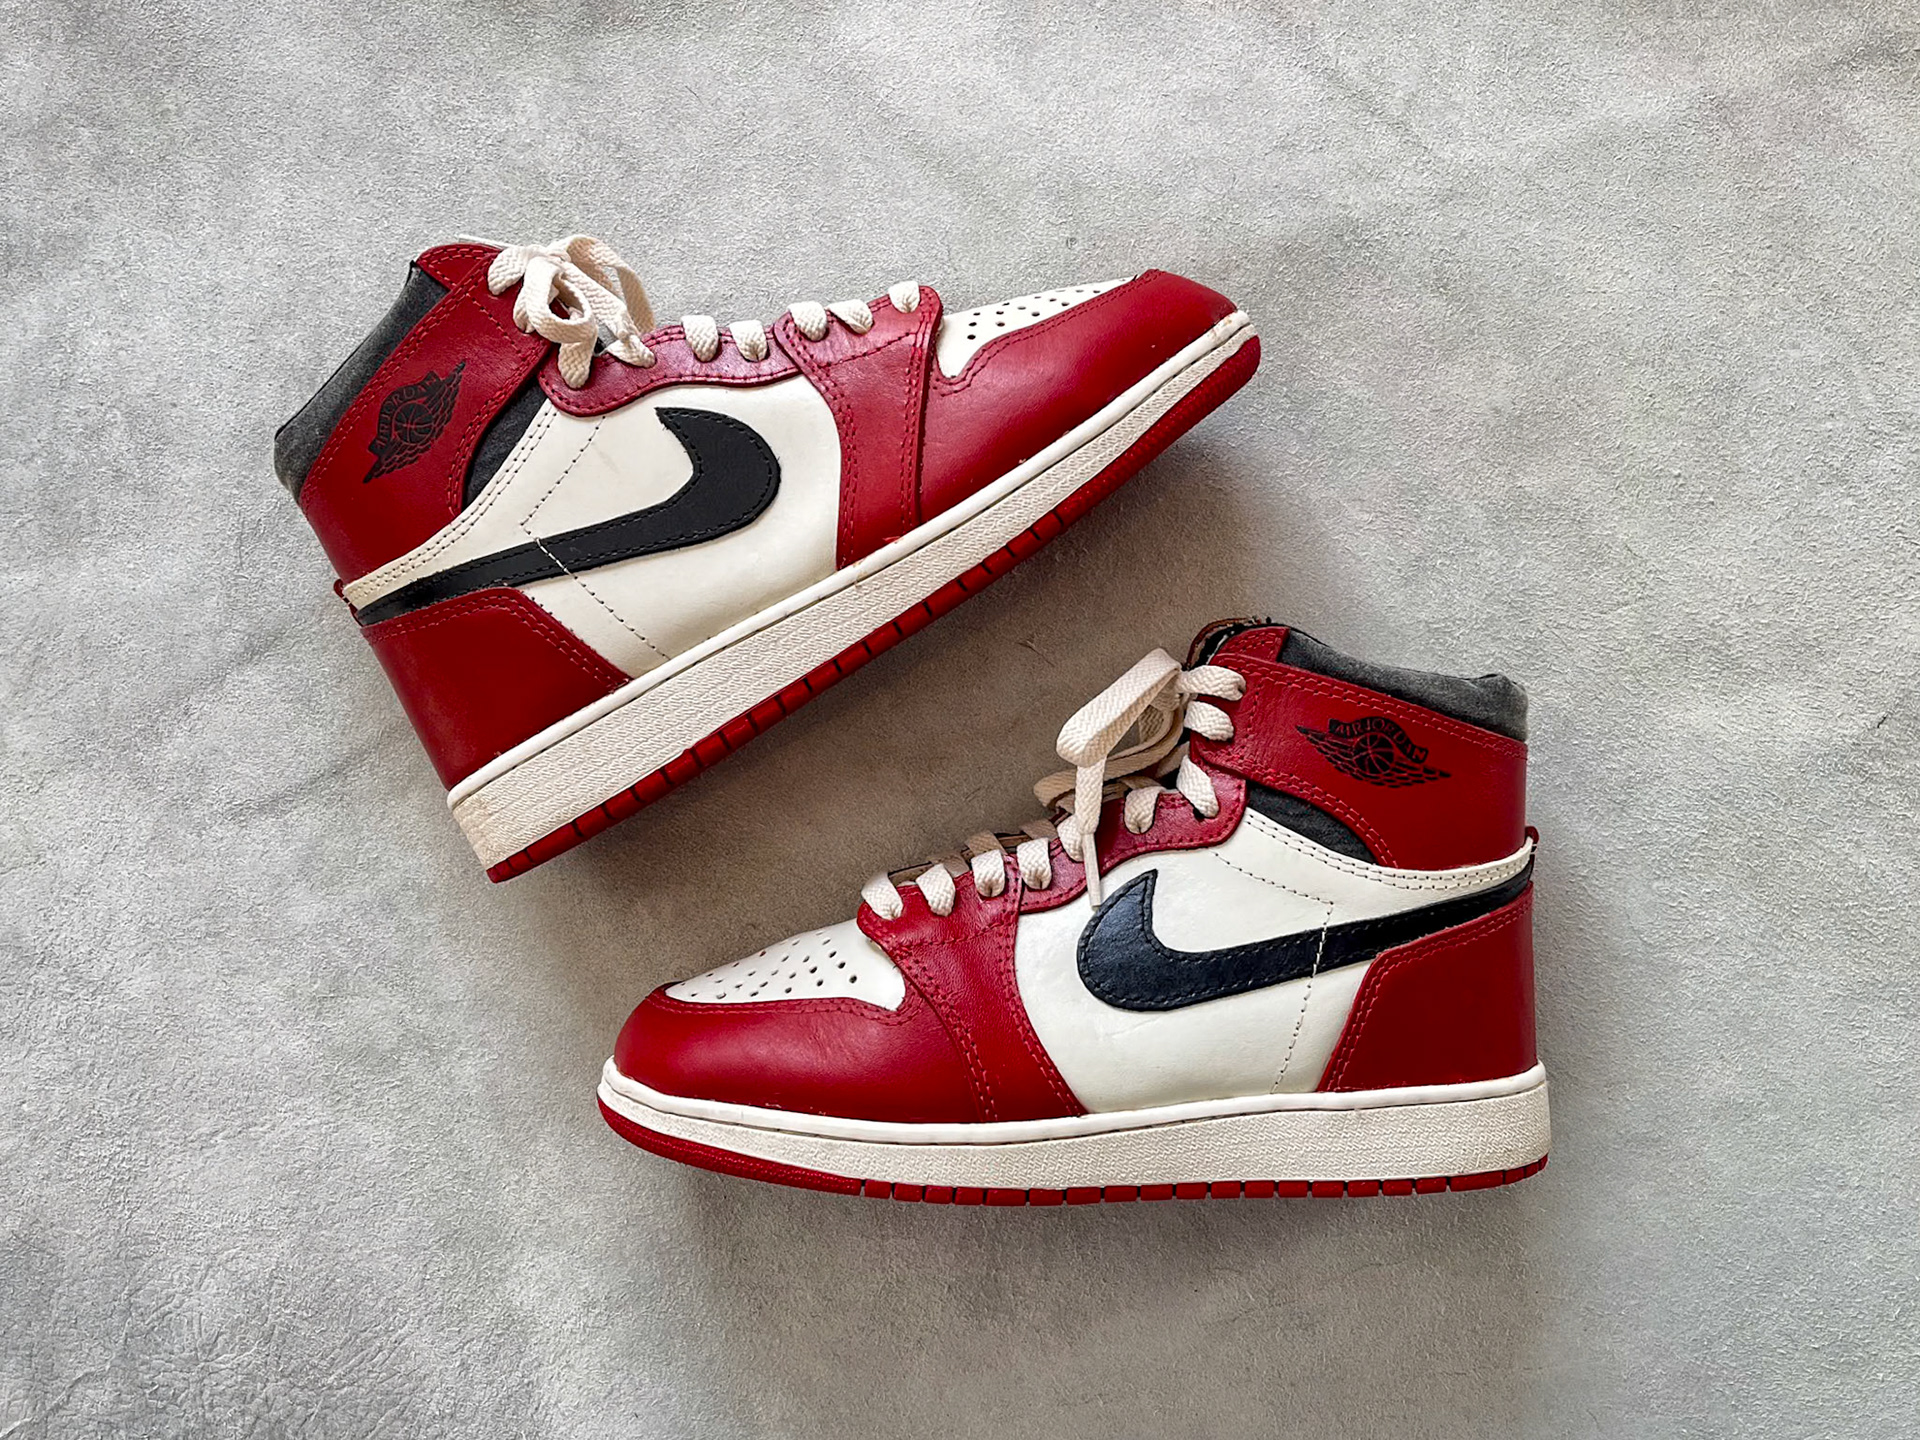
The first step in making a shoe is to acquire a pattern. The pattern is a 1:1 template from which every panel of the shoe is derived. There are a two main ways to obtain a pattern - purchase one from an online retailer, or cut apart a shoe and scan the pieces yourself. In my case, I wanted to construct a 1985 Air Jordan 1 true to the original cut, and chopping up an original pair wasn't really on the table. I sourced my pattern from MaxHanke.com, who offers Air Jordan 1 patterns scanned from original pairs. For my first pair, I used his size 12 scans from an original pair of 1985 blue metallics. Max's website and YouTube channel have been a great inspiration and an unparalleled resource in constructing my own pair from scratch.
STEP 2 - GATHER MATERIALS
STEP 3 - TRACE, CUT, SKIVE, PAINT
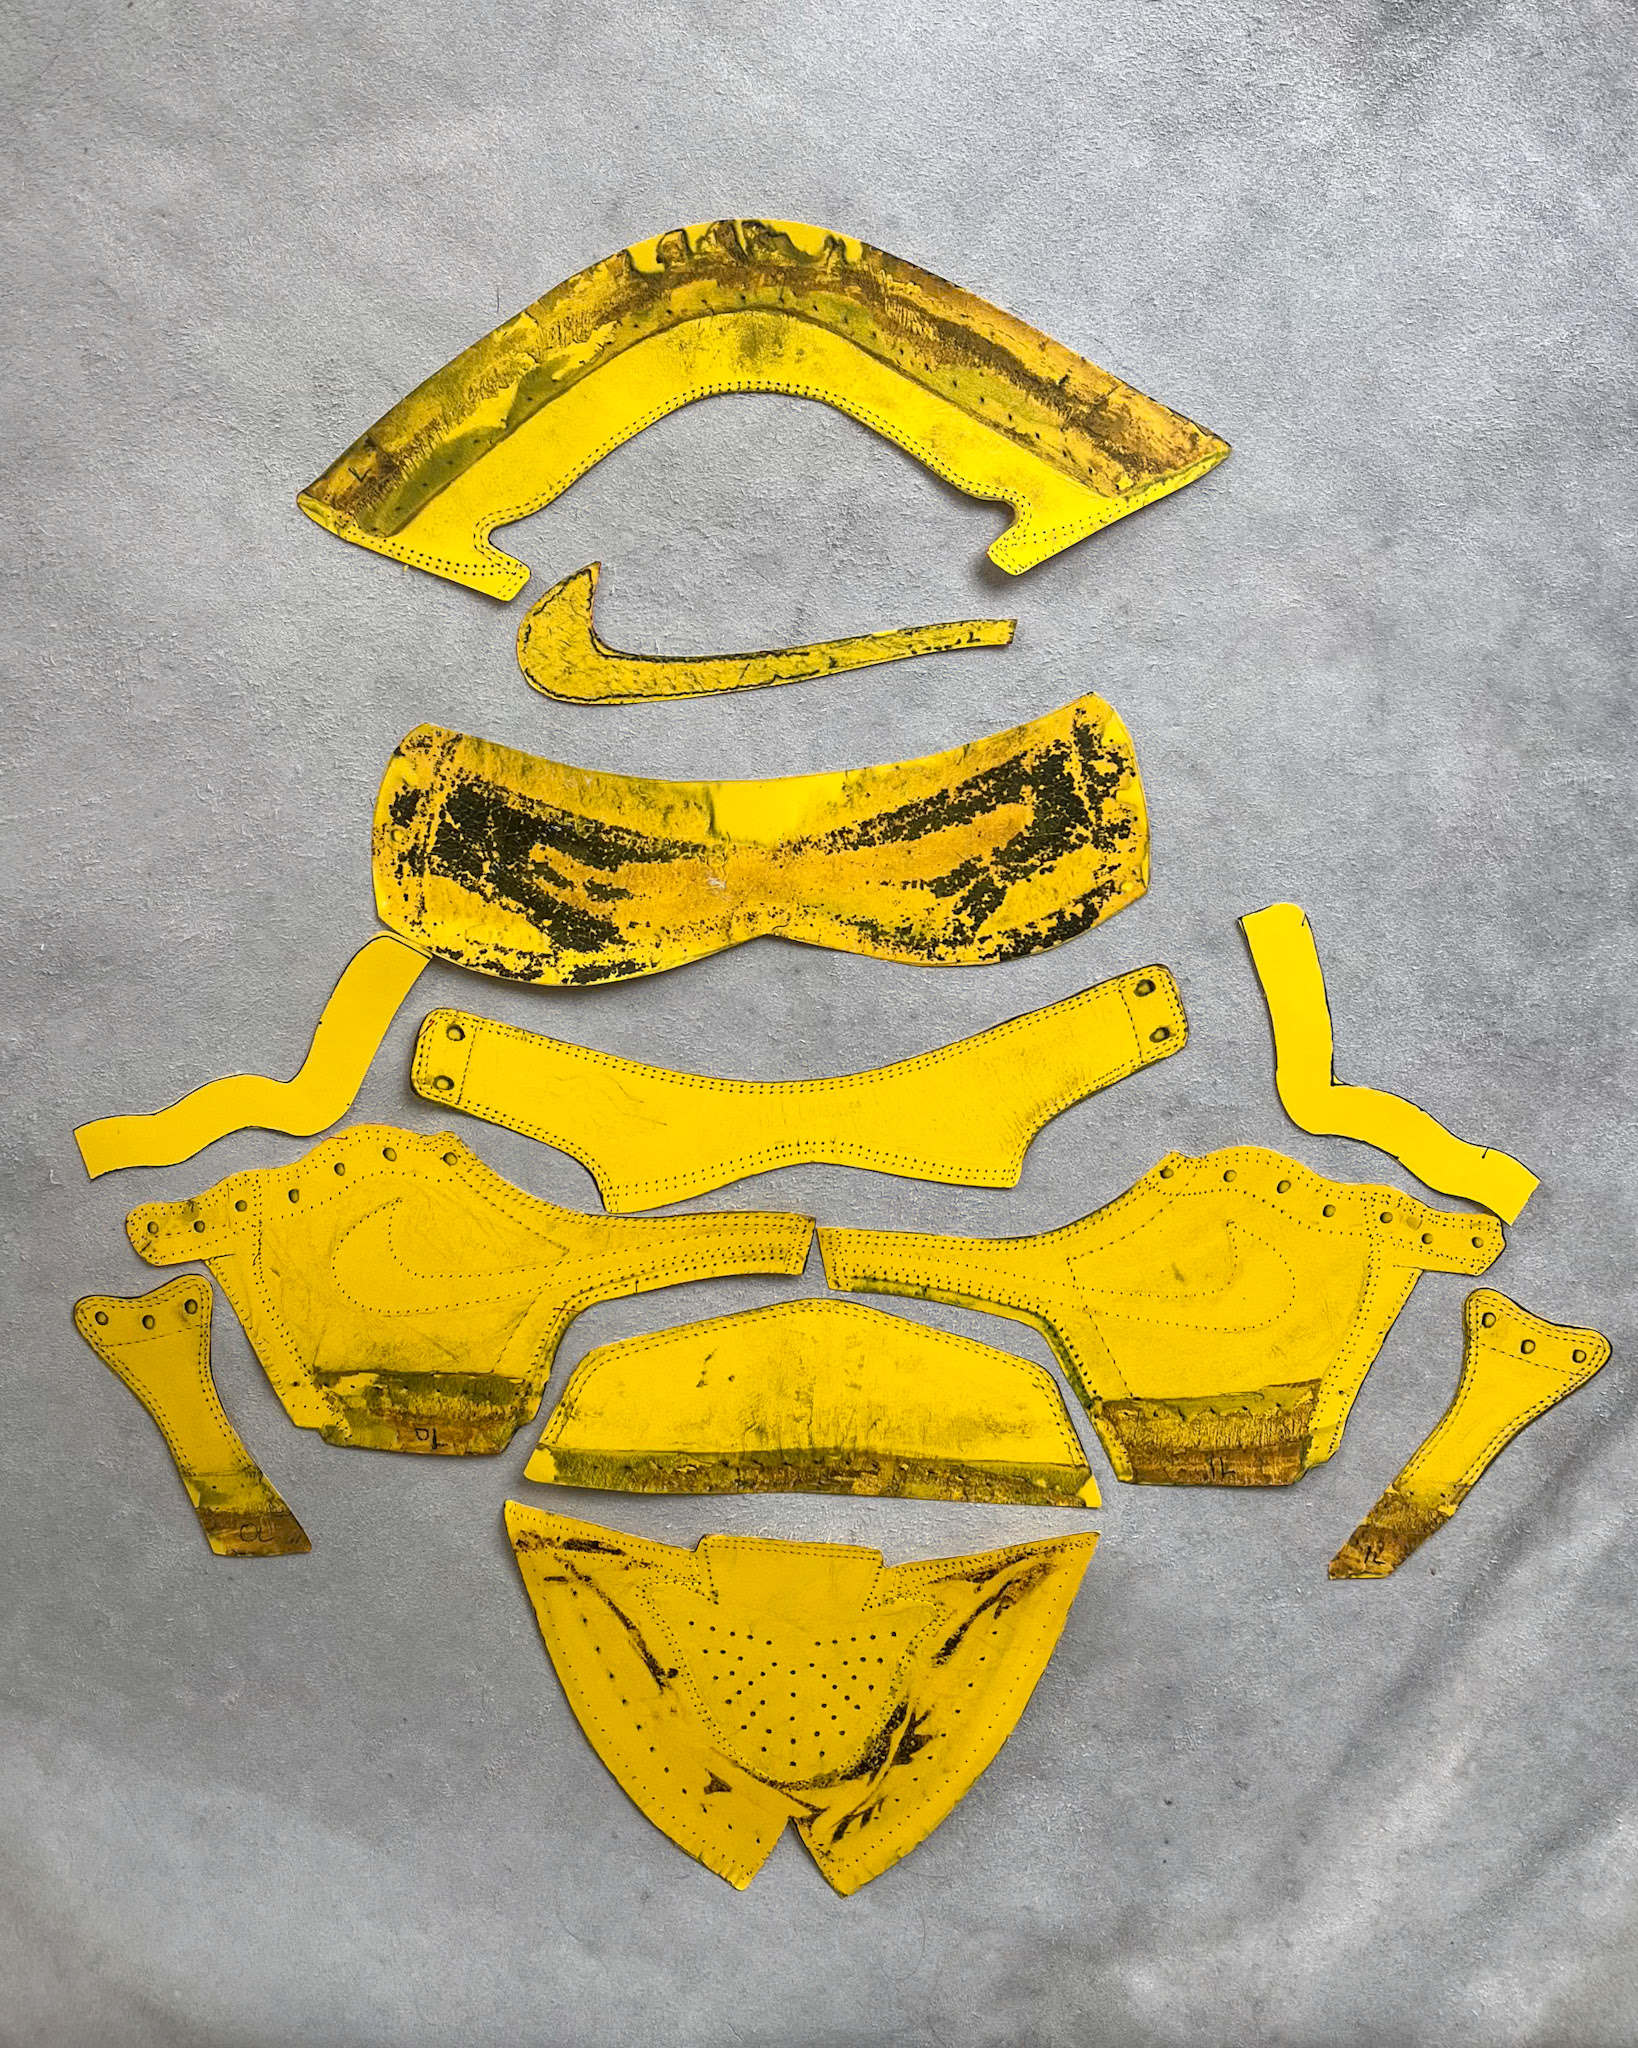
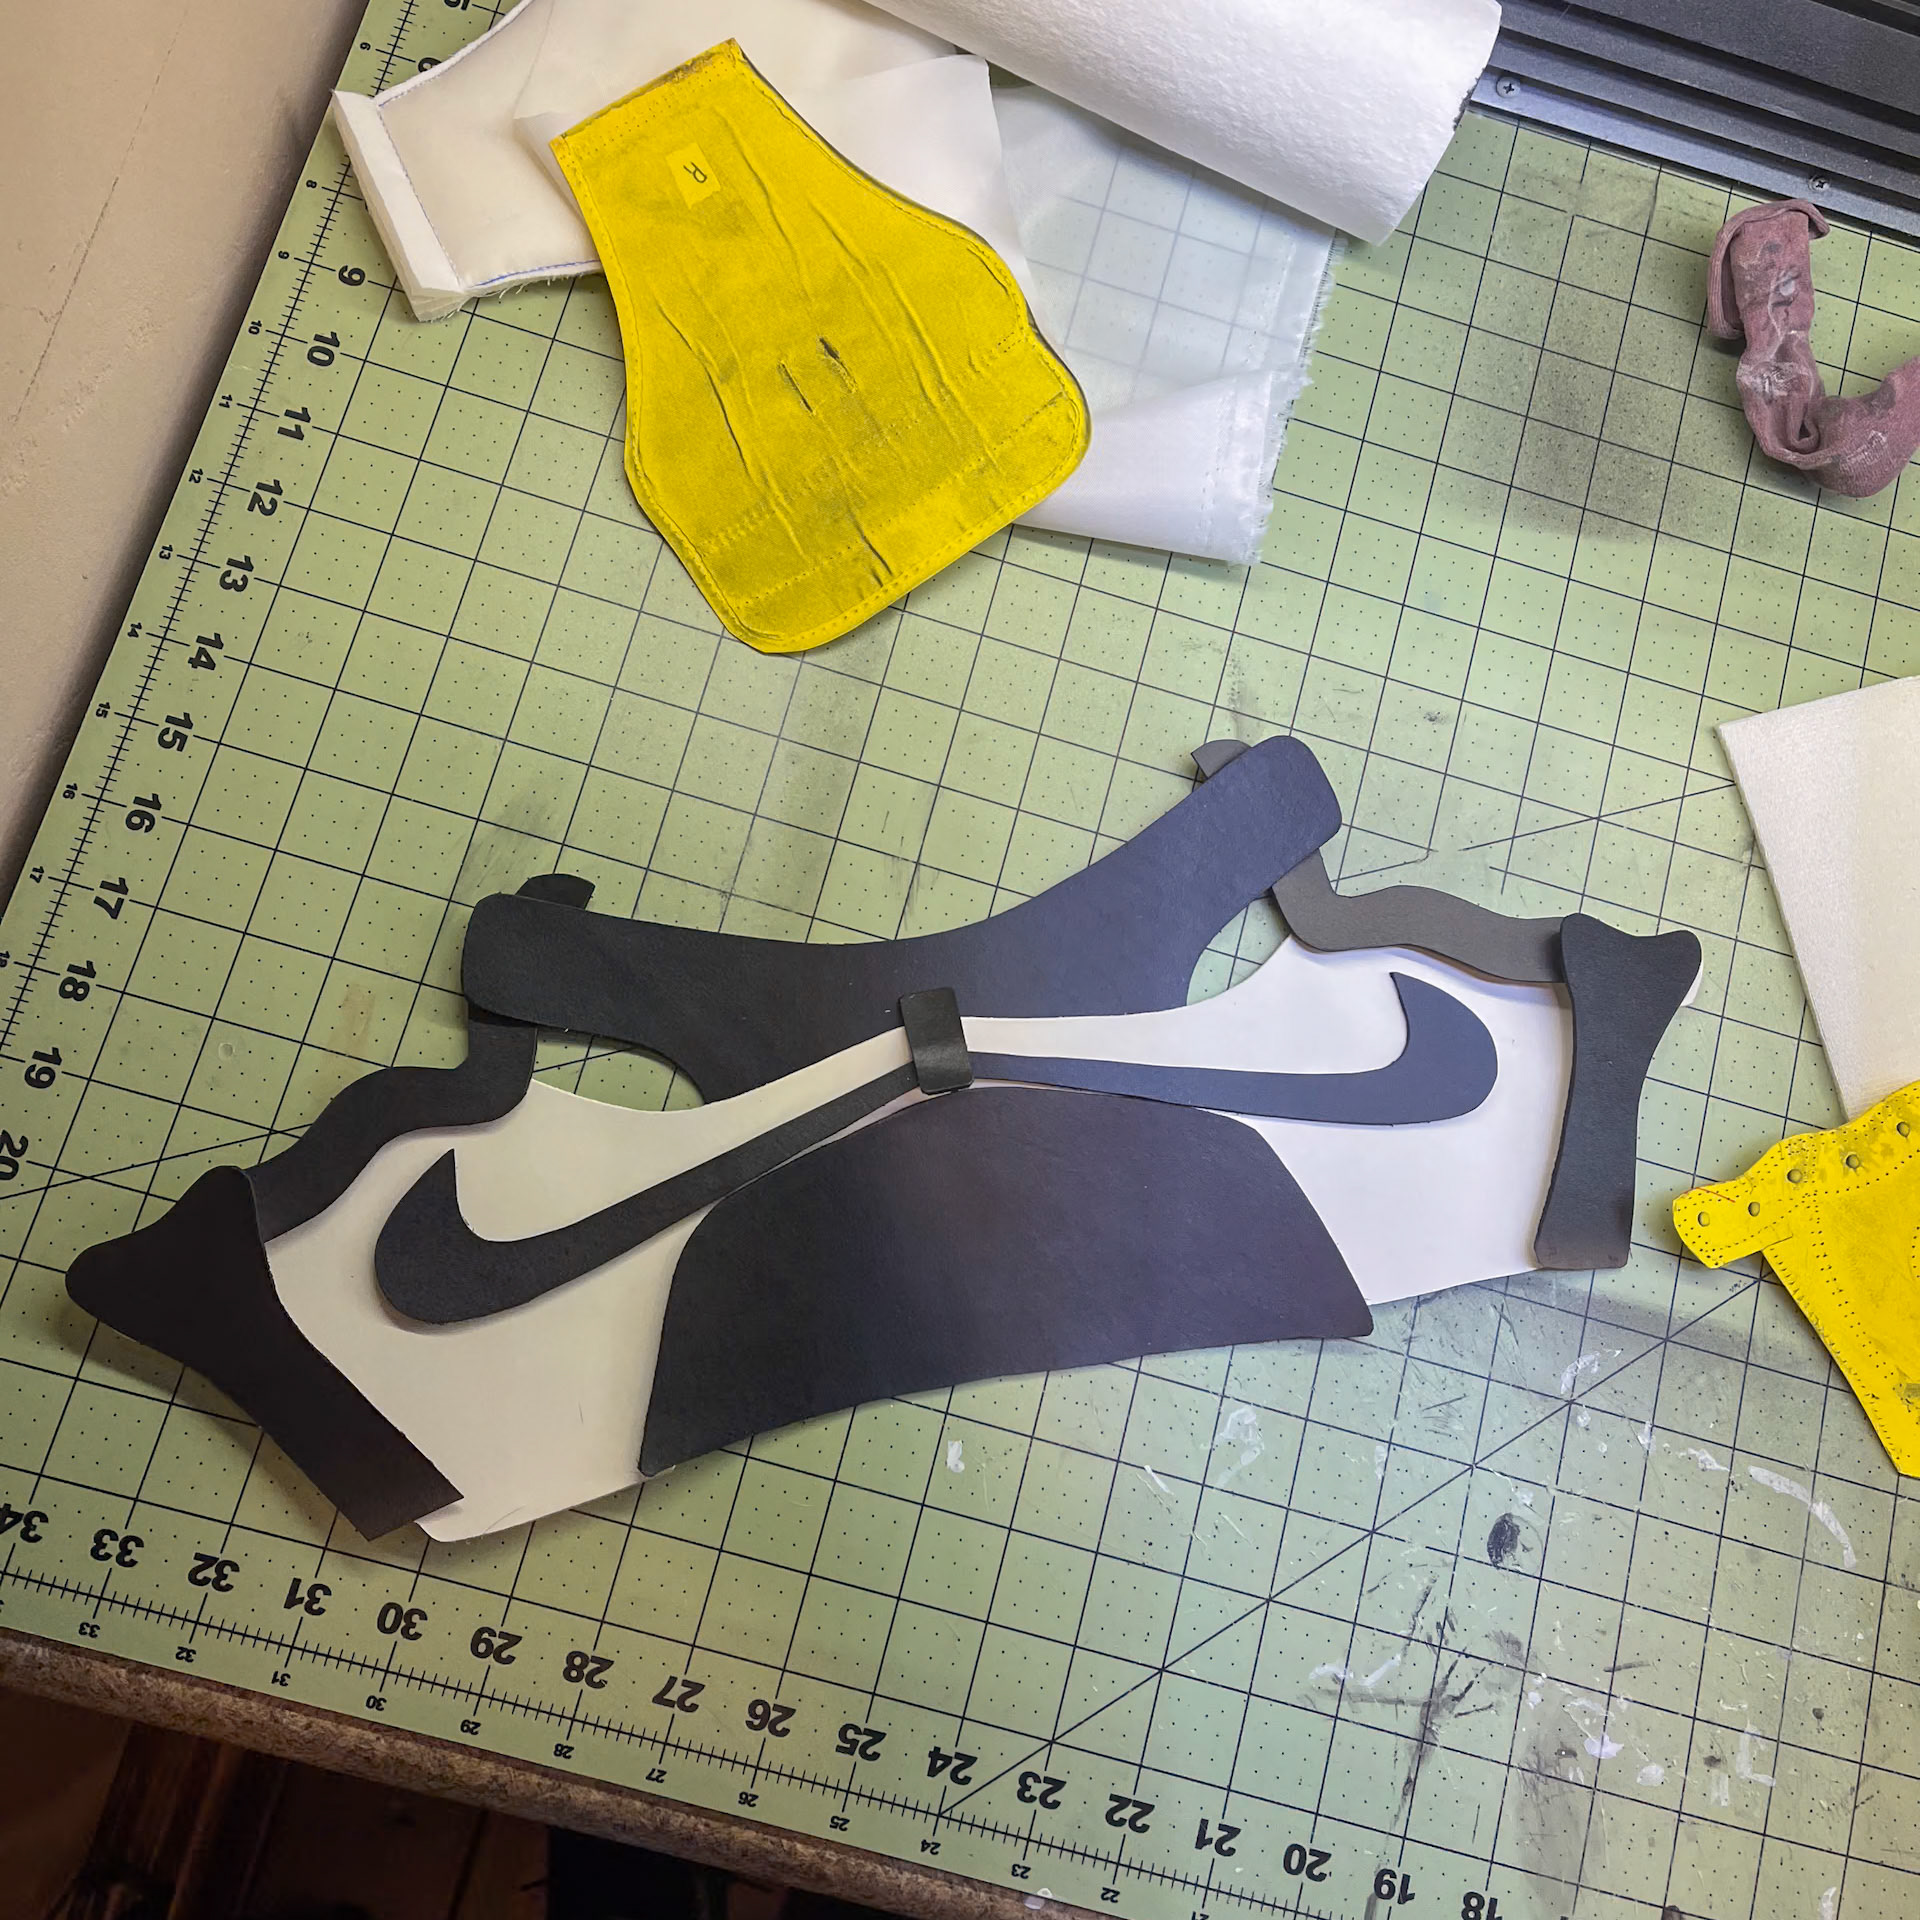
I started by tracing the pattern onto the leather and cutting out each panel with a sharp pair of shears. A blade can also work, but I found it left a less consistent edge than the scissors. With each panel of the shoe cut out, I proceeded to skive the ends of certain panels to reduce thickness during assembly. I then prepped the pieces for painting with isopropyl alcohol. For my first shoe, I went with a black and white colorway, which simplified the paint-mixing process significantly. I used 3-4 coats of Angelis leather paint along with one coat of gloss finish, all applied via airbrush.
STEP 4 - STITCH THE QUARTERS
Before assembly, I lined the quarter and toe panels with canvas using HeatnBond. I then proceeded to stitch the heel and overlay panels to the quarter panels using a heavy machine thread. Initially, I tried to punch through the leather and lay the thread in one pass, but jamming became a significant issue. I soon realized that my machine was not rated to sew thick leather, and remedied the problem by first punching the holes with a blank needle, and then laying the thread on a separate pass.
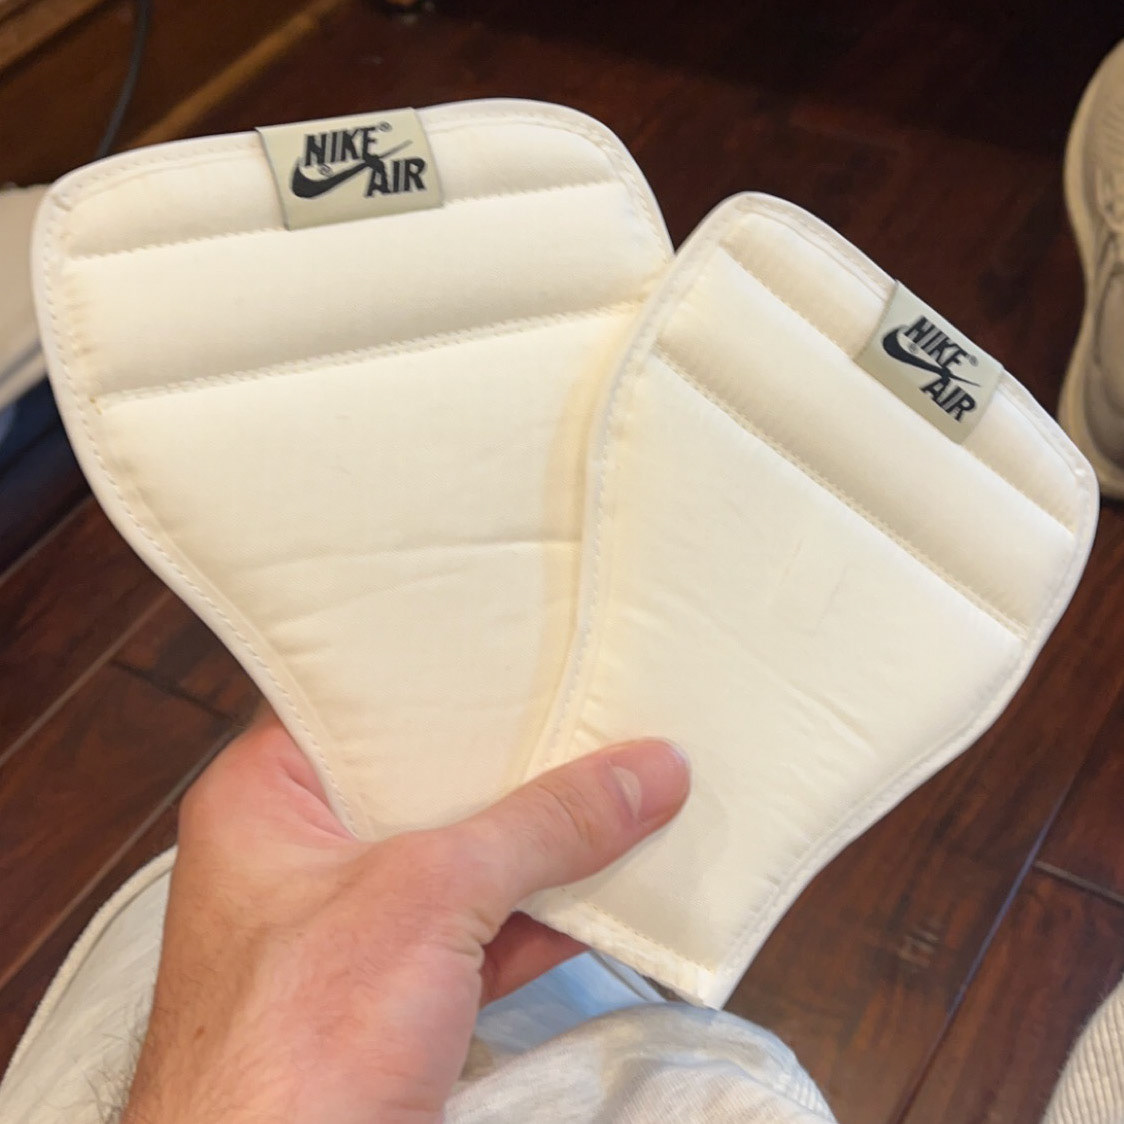
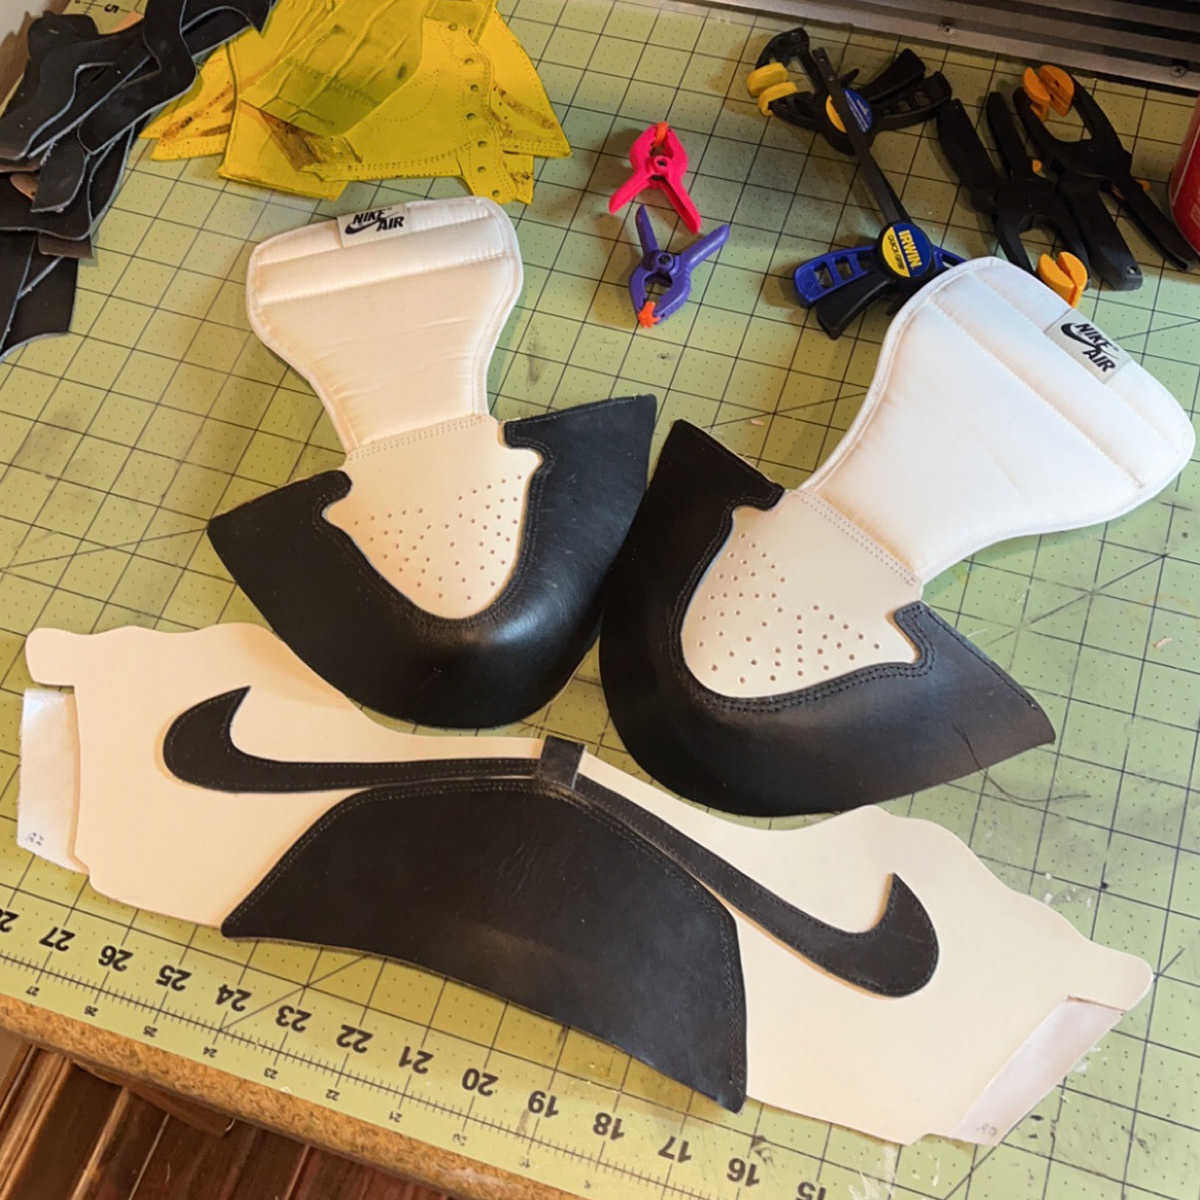
STEP 5 - FABRICATE THE TONGUE
One of the more complicated constructions on the shoe was the tongue. I used three layers of thin foam for the cushioning, followed by outer layers of nylon and cotton. The piping was made from thin strips of folded nylon, cut diagonally from the roll to allow the piping to stretch around the tongue's perimeter. The material selection for the tongue took a lot of trial and error, as well as several trips to the fabric store. The tongue tag was sourced from Foxtrot Uniform. Once completed, I attached the tongues to their respective toe panels.
STEP 6 - COMPLETE THE HEEL